Portable Kayak
Live Bait Tank/Live Well
There are many variations of bait tanks for kayaks. It is probably the easiest project to undertake, but some decisions need to be made ahead of time. This is what I like to call the minimalist version and it is portable between kayaks. You can strap it down to the deck of many different kayaks. It is minimalist in that the elimination of the battery box and the switch simplify the project. If you need to build a battery box with a switch they are quite simple and I will probably make a web page for one in the future.
The first and most important consideration is what kayak you will be using this tank on. The container for the tank can be anything from small ice chests, to Rubbermaid containers, to even a five gallon paint bucket. The larger the container, the more you have to consider how the weight of the water will effect the stability and performance of your kayak. The reason why used a 5 gallon bucket is that my Malibu Kayak Pro Explorer's tank well was molded for this bucket, there is actually a round impression at the bottom of the tank well to set the bucket in.
The advantage of a larger size tank is that it can double as a live well for tournament fishing.
This project will use a number of different tools and the ability to work with electrical parts. If you do not have the tools shown in this project, then it is probably not a good idea to attempt making a tank for yourself.
Tools needed will include power drill with assorted drill bits, driver bits and hole saw blades. Also wire cutters/crimpers, screw drivers, sandpaper and a razor knife.
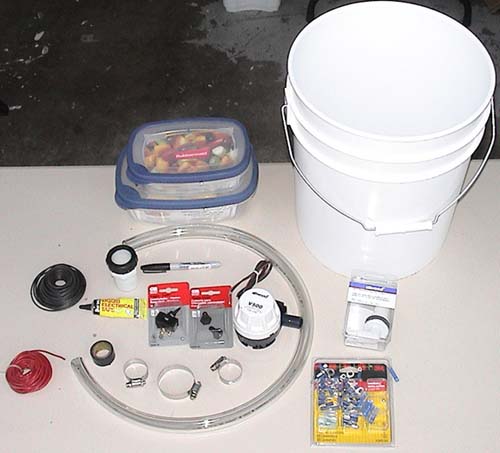
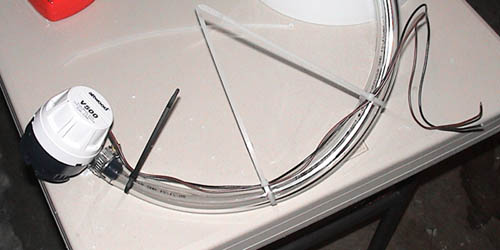
The parts will include a bilge pump, Attwood spray head, 1-1/4 inch drain pipe, stainless hose clamps, zipties, liquid tape, pre insulated terminal connectors, 3/4 inch I.D. hose, extra 16 gauge wire, 12 volt battery, battery charger and drybag.
Not all bilge pumps are equal, The pump I use in this project is not the greatest. It is a battery hog at 1.4 amps. There are others at 1 amp, which would be a better choice.
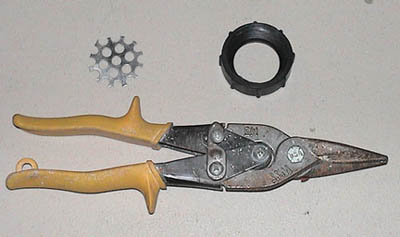
When I originally started this project, I was going to use one of the Rubbermaid boxes in the picture as a water proof battery box. Also in the picture is an outdoor switch and switch cover which I planned to mount on the battery box, however I have really come to prefer dry bags and will explain why later on. The blade style terminal connectors either come in a package with a bunch of other terminal connectors in any auto section at most stores or you can get them separately at Radio Shack. You can get the fully insulated terminal connectors from Radio Shack which are higher quality than the typical half insulated terminal connectors in the picture above. You will see the difference in the crimps that are shown in the pictures later on.
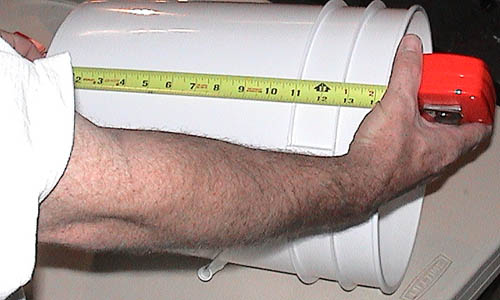
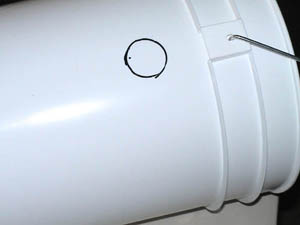
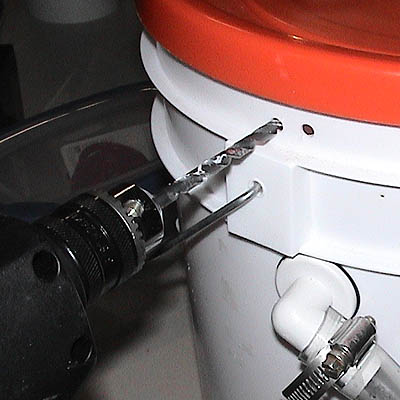
On a five gallon bucket I chose a measurement of 8 inches from the bottom of the bucket as the lowest point of my drain. That will give me some room for the water to slosh around and not spill out on my back.
 |
|
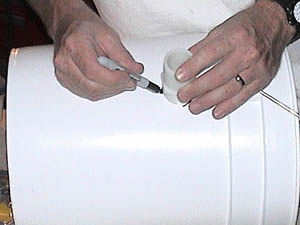
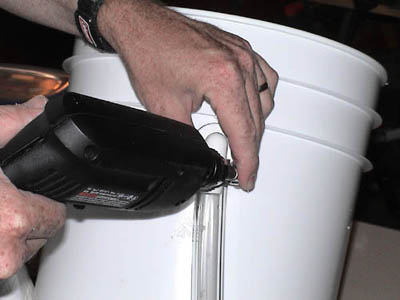
In using a hole saw smaller than the hole needed, the drain will tightly screw into the hole eliminating the need for sealants.
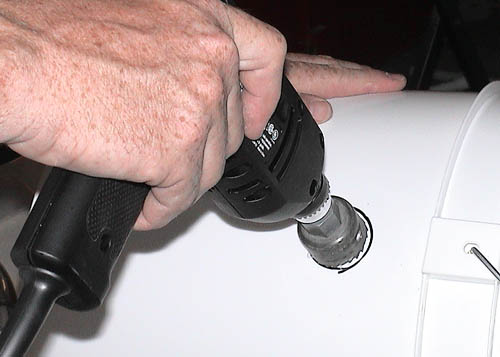
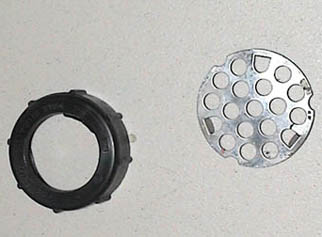
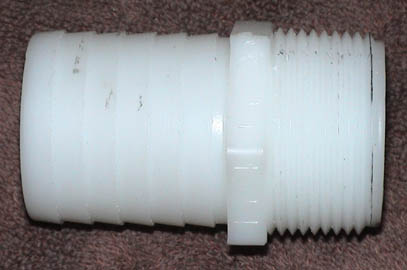
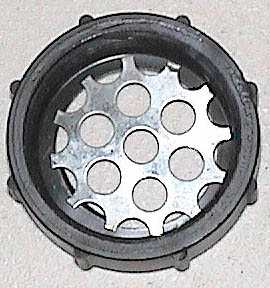
The drain I picked up for this project is 1-1/4 inch pipe threaded on one side and the other side ribbed for a hose and hose clamp assembly. I bought this piece at West Marine along with the stainless hose clamps. I went to my local building supply store and picked up a 1-1/4 inch compression ring, just like the ones used on the sink trap used on your bathroom sink. I also picked up a shower drain replacement screen.
|
|
|
The drain piece is optional. The only reason why you might want to use a fitting like the one in the picture on the above right, is if you want to direct the flow of water out of the tank with a hose. The solution is to drill holes in the tank at the level you want the water to drain and drill enough small holes at the water line so that the pump cannot out pace the draining water. Depending on the size drill bit you use will determine how many holes you will need to drill. Too big a drill bit and your bait will leave through the drain holes. I decided I wanted a pipe fitting. The fitting I chose directs the water to flow out on to the gunwale of my tank well and over the side. The draining water is very quiet and does not splash on my setup.
Using sheet metal cutters, trim the screen to fit inside the compression fitting. Check the fit and trim off any needed areas until it fits inside.
|
|
|
|
|
 |
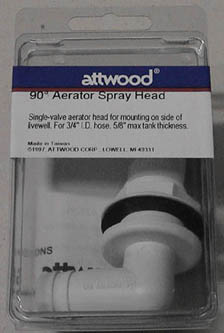
The Attwood spray head can be picked up at Walmart for less than a couple of bucks. There are two ways to set this up. One for silent running and the other for extra aeration. Locate the spray head on the opposite side of the bucket from the drain fitting and drill a hole. If you locate this hole a little bit lower than the drain fitting, then the water will flow in silently. I used a 1 inch wood bit which drills a perfect hole. Otherwise, locate the hole above the level of the drain so the spray head sprays water from above the tank water level.
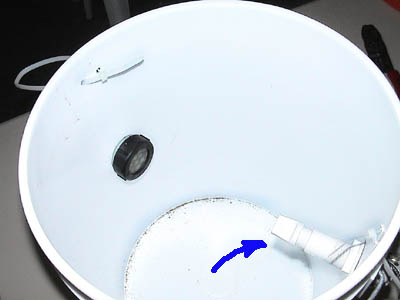
The blue arrow shows the adjustable screw on the spray head. The nice thing about this spray head is that it is adjustable and you can control the flow with an adjustment screw on the head.
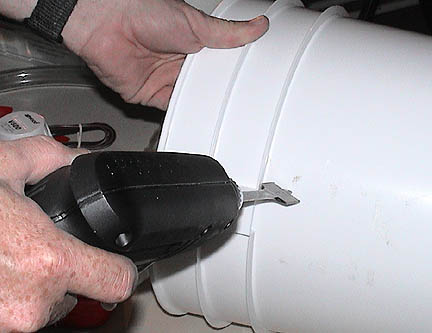
After you install the spray head, take the 3/4 inch I.D. hose and push it on the spray head. Then take a hose clamp and slide it on the hose and tighten down with a screw driver or drill.
You should notice that the spray head has been adjusted to point back. This also helps to direct the water flow to run in a counter clockwise motion in the tank. Mark the hose at the desired length and cut it.

Take the end of the 3/4 inch I.D. hose and slide on a hose clamp and then push the hose on the on the bilge pump. Then tighten down the clamp with a screw driver or drill.
Using zipties, secure the wires along the intake hose. Trim the zipties with wire cutters or scissors.
|
|
|
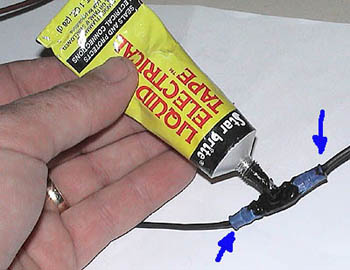
Using a crimper, crimp terminal connectors on the wires from the bilge pump and then make extension wires from 16 gauge wire. I like to use opposite terminal connectors on the two leads from the bilge pump. A female blade connector on the one lead and a male blade connector on the other. Then match the correct gendered connector on the extensions remembering that the ends that attach to the batteries need to have female connectors. Crimp connectors on both ends of the extension wires.
Using Liquid tape, coat the area where the wire enters the connector (See blue arrows in picture above right). On the black lead, connect the black extension wire you made and coat the entire connector with liquid tape as shown in the picture above.
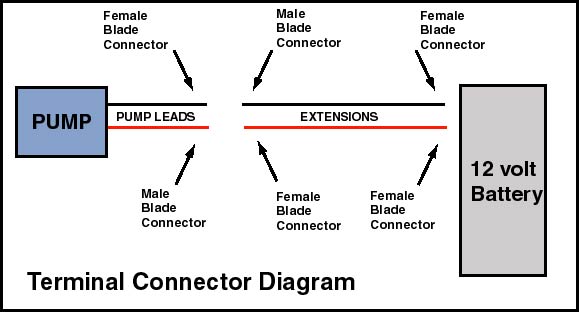
Do not liquid tape the colored lead terminal connectors together, but seal up the openings around the blue insulator. By leaving the connector blades uncoated you can disconnect the power from the battery without having to open the drybag to get to the battery and better yet, you don't have a mechanical switch that can fail from saltwater exposure.
|
|
|
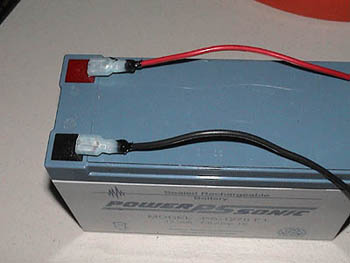
Connect the wires to the battery. The pump should go on if the battery has a charge. Just disconnect the wire at the center connection as shown in the picture below at the blue arrow.
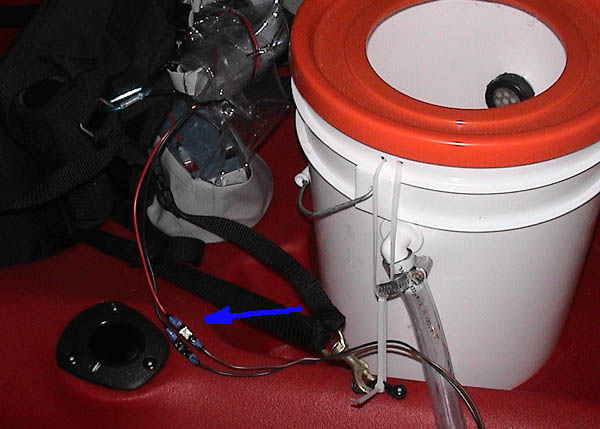
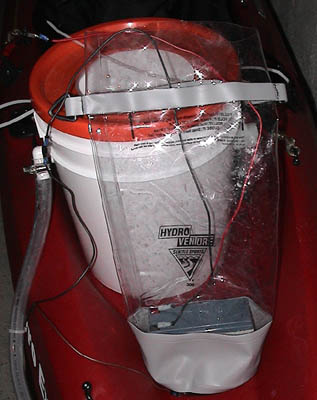
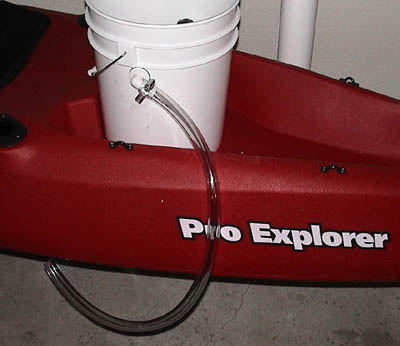
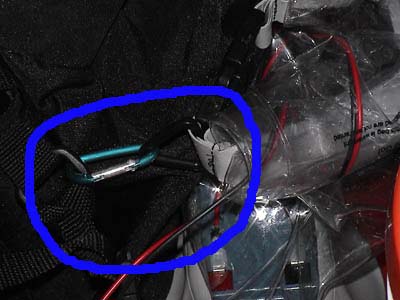
Roll the drybag up and use a karabiner to secure the dry bag to one of your seat straps and place the drybag behind your seat This is why I like using drybags. They are easy to deal with, it is easy to disconnect the battery and put the dry bag and battery in your hull and if you are not using your bait tank, you can use the drybag for something else you need to protect.
To secure the bait tank to your kayak, Drill a couple of holes on each side of the tank up by the rim. The holes need to be big enough to run a ziptie through.
Using two zipties per side, loop a zip tie through the rim hole and loop another ziptie through a pad eye and then up through the looped ziptie on the rim. This is very secure and better than bungee.

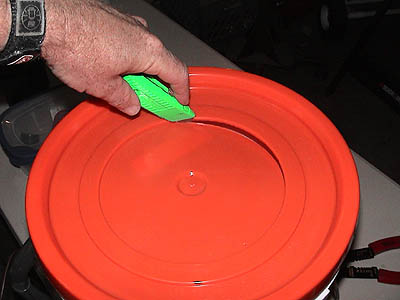
To keep the water from sloshing out on to your back and to help keep the bait from jumping out, cut a hole in the center of the lid. After you cut out the lid, take a piece of sand paper and smooth down the edge of the hole you just cut.
Depending on your level of comfort you may want to get a bait net to scoop out bait, if you don't want to stick your hand in there and and chase them around.
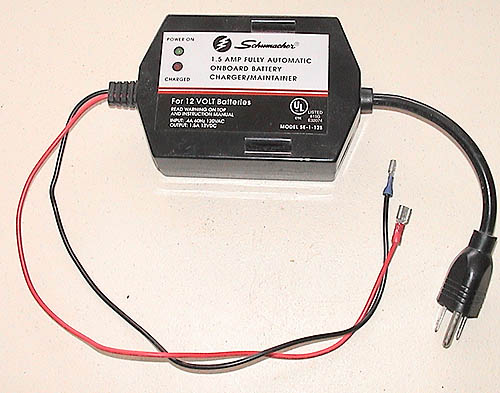
Recharging Batteries
If you have a rechargeable 12 volt battery for a fish finder or your live well, you will need a charger. Don't be cheap when purchasing a battery charger, you can get a charger that will not only charge your battery, but automatically shut off when it senses the battery is at a full charge. I choose a battery maintainer and modified the leads to work with my 12 volt battery.