|
How to Install a Fish Finder By Ted Mackel Before you decide to take this project on, make sure you have the tools used in the project and have experience using them. WARNING! Check with the manufacturer of your Kayak before attempting any of the following procedures. The following procedures may:
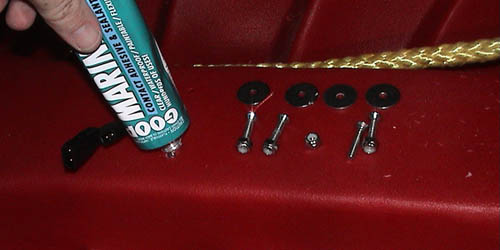
Please do not attempt this installation unless you are well experienced with power tools. Make sure to read all safety instructions for all power tools you use and make sure to wear proper safety equipment such a safety glasses, respirators, etc. The author of this information and the owners of the websites that host this information are not liable for any problems or issues that arise from the use of this information. Users of this information hereby acknowledge that all use is of this information is done by their own free will, at their own sole risk, understanding that injury or death could occur. You will need to purchase a fish finder and if you have not chosen one yet, let me explain why I chose the the Humminbird 200 DX. I wanted a simple design with a smaller head. I have a Humminbird Wide Portrait on my tandem and the wider screen is not needed. Second, I was able to pick up this fish finder, brand new in the box from eBay for $131.00 shipped to my home. Is this the best Fish Finder? For the price, it was right for me and I was already comfortable with Humminbird products. I have seen better, but not for the same price. If you want to use a Lowrance or Garmin or some other brand, it's all a matter of personal preference. Just keep in mind that the base plate and holes for cables will be different. It's important you buy a fish finder you like and are comfortable with and not just because you saw this one installed here. You will need a drill and drill bits, sandpaper, a small file, phillips head screwdriver, box wrench, wire cutters/crimpers, a tube of marine goop, cellophane packing tape, black sharpie, pencil and a piece of scrap wood. You will also need some stainless aircraft nuts and bolts, stainless fender washers and electrical crimp connectors.
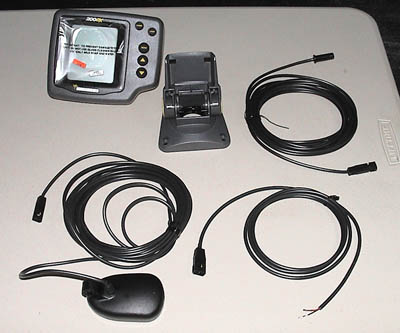
In the picture above, starting from the upper left hand corner, moving clockwise, is the display, mounting base, temperature probe (came free with my purchase but it is not used), power cord and transducer.
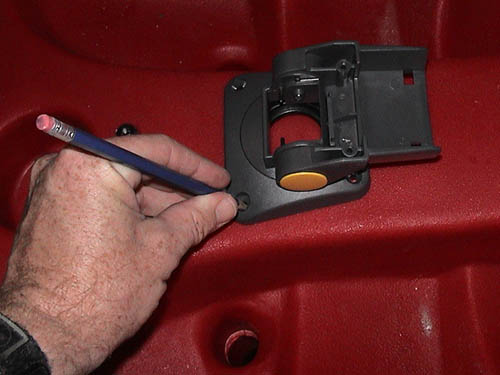
You need to decide where you want to locate your fish finder on your hull. I took my kayak out on the grass in my yard and sat in it. I put the display on the mounting base and put it in a few different locations. I checked to see if it interfered with my feet or if it was okay when I sit side saddle on the kayak. I also took in consideration where I was going to mount my forward rod holder and how it might affect my ability to access the front hatch. I figure in this position, I could remove the display and position the mount in the down position (as shown in the picture above), when I needed to access the front hatch while underway. Using a pencil, mark the bolt hole locations. You probably will not be able to get a sharpie down the bolt hole locations, so use a pencil. Next as you see, go back and use a sharpie to better identify the pencil marks.
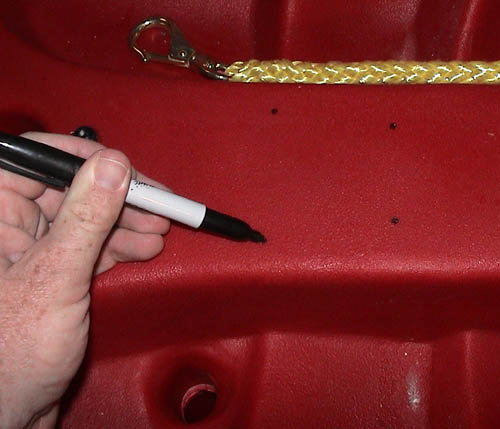
The location of the hole for the transducer cable is in the center of the four bolt holes for the mounting base. Place the transducer connector on the hull in that location and mark it with a pencil and then use your sharpie to better identify the mark.
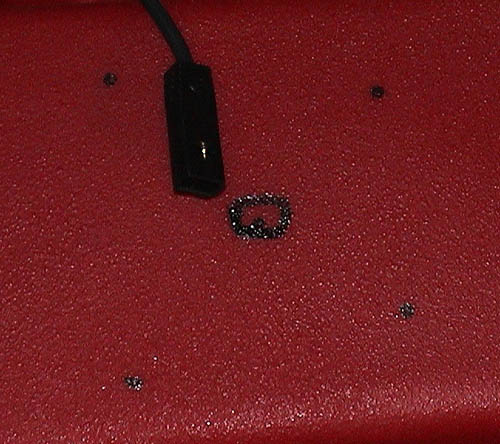
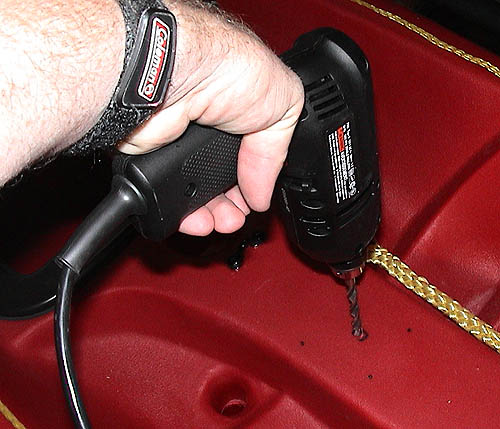
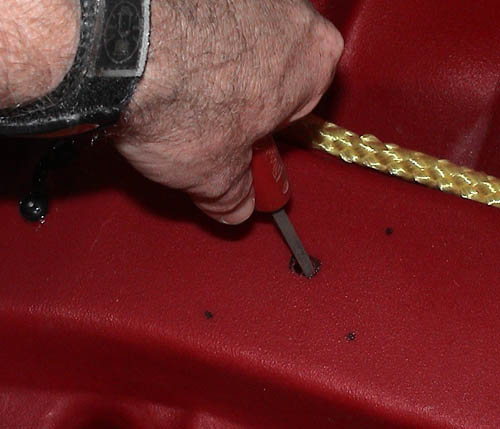
Using a drill bit, drill two holes side by side in the marked location for the transducer and power cables.
Next use a small file to clean up the hole for the cables. Try and make this hole as tight as possible so that the transducer connector only goes through with some effort. NEVER CUT THE TRANSDUCER CABLE. If you cut the transducer cable, you will destroy the calibration between the transducer and the computer and will need to order a new transducer.
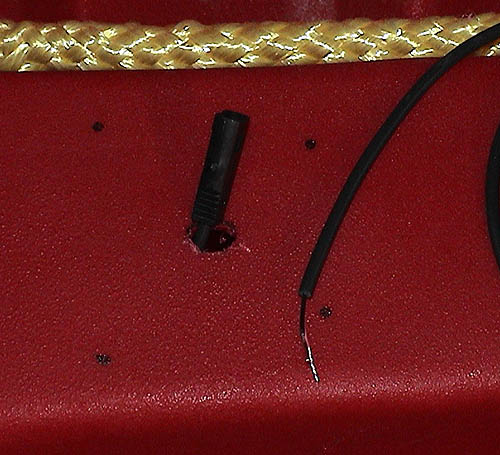
When you feed the cables through the hole, the transducer cable is fed up through the hole from inside the hull and the bare wire end of the power cable can be fed down through the hull from the top.
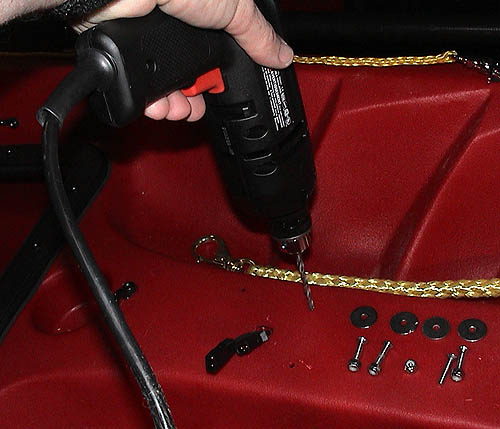
Next get a drill bit the same size as your stainless mounting bolts and drill the holes for the mounting bolts.
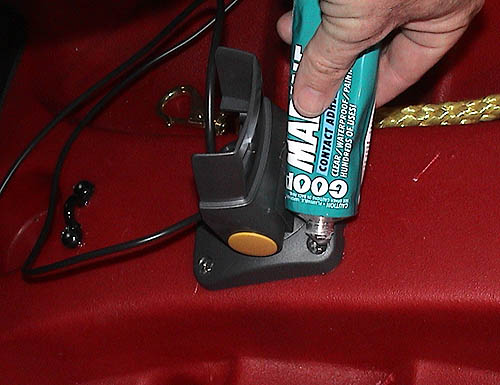
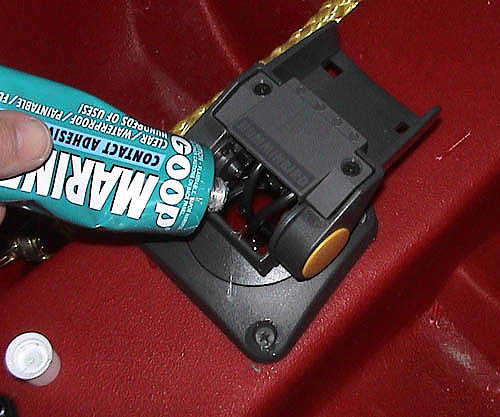
Squirt goop in each of the bolt holes for the mounting screws. Use goop and don't be afraid that it is overkill. The more places you can keep saltwater out of the better.
Screw in the stainless bolts and inside the hull, install one stainless fender washer and one stainless aircraft nut on each mounting bolt. Fasten the bolts with a matching box wrench. On my kayak these bolts can be accessed through the center hatch. Fill the tops of the bolts with goop. Once you put this mount on your kayak, you're not going to take it off, so it is better to seal off this area and keep the saltwater out.
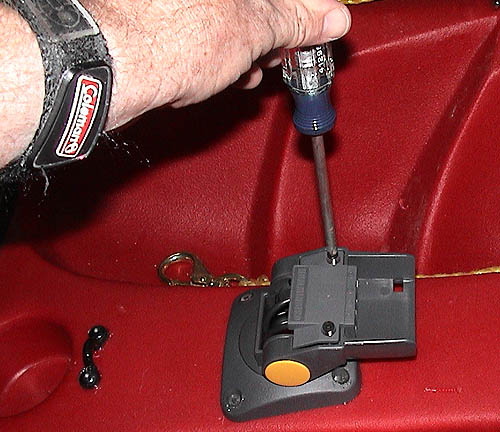
Next, attach the wires to the front half of the plug head.
Place on the metal retaining clip
and screw the front half of the plug head on to the mounting base.
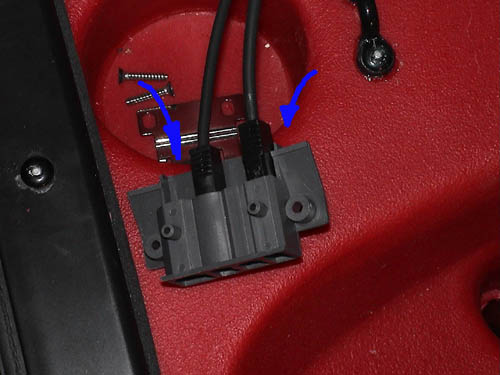
Flip the mount head down flat in the forward position and this will feed enough cable through the hole so you can seal the cable hole. Take cellophane packing tape or some other similar type tape and from the inside of the hull tape off the hole around the wires. This will keep the goop from dripping down into the hull. Now squirt plenty of goop in the center hole of the base mount around the cable hole.
Here is a picture of the mounting base from the inside of the hull
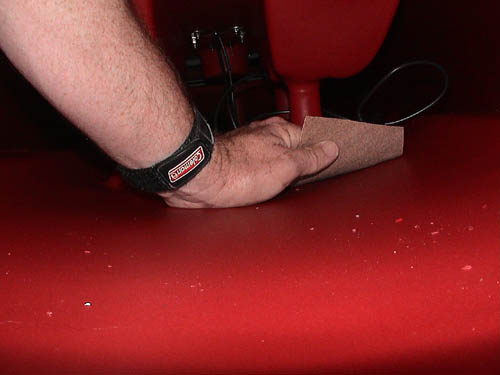
Now for the transducer. First locate a flat surface in the hull that will allow your transducer to point straight down or as straight down as possible. If you can locate the transducer near a scupper hole even better. With the transducer near the scupper hole, the center will be clear for rod storage. Prepare the area by cleaning the area with rubbing alcohol and then using sand paper, sand the area where you will glue down the transducer.
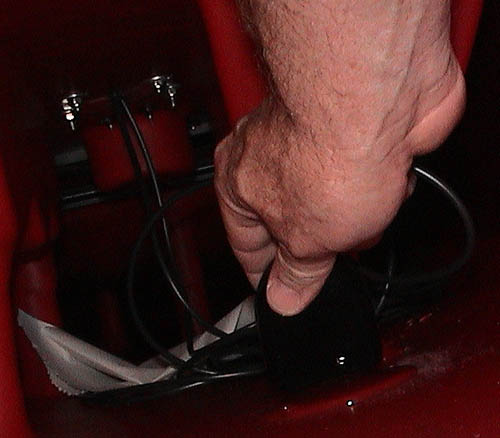
Next it is time to lay down a bed of goop to lay the transducer in. Hold the tube against the hull and squeeze out the goop. Do not lift the tip of the tube out of the puddle, but keep it buried in the puddle and mound out a large puddle. If you keep the tip of the tube of goop submerged in the puddle as you squeeze it out, you will keep air bubbles out of the glue. (Pastry Chefs use this same technique when working with icing to keep air out of of the icing.) Air bubbles in your goop will cause the transducer to malfunction. It is important that you keep air out of the goop and that you force any trapped air out. Once you have a large puddle of goop, take the transducer on it's back edge and place it in the goop on it's back edge. Then slowly lower it into the goop, rocking it down from the back edge. This will help force out any air bubbles.
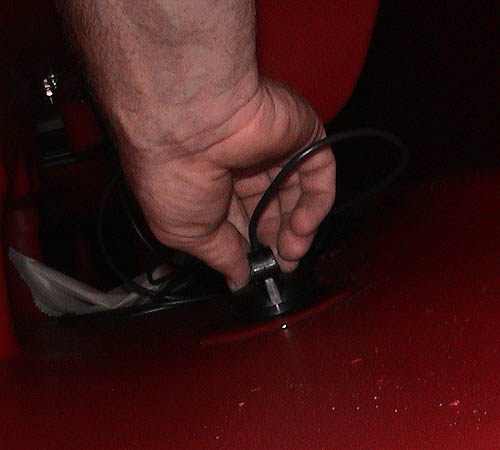
Then push the transducer into the goop and use a slow twisting motion while pushing down to force out any possible air bubbles. Before you get out the glue take a piece of scrap wood in your garage and make a wedge that will fit between the top of the transducer and top of the hull to hold the transducer in place while the goop sets up.
If your wedge is not tight enough, then you can use scraps of cardboard as shims.
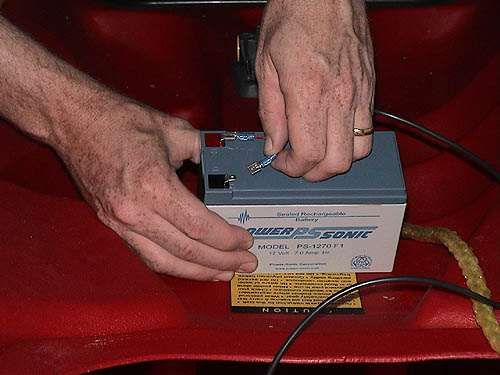
It is important that you let the goop setup over the next 24 hours minimum. More time is even better. Now it is time to address the battery. You will need a 12 volt battery. I have a 7 amp battery and it runs forever, but you can scale down for the fish finder into a 3 amp hour battery and be just fine for a full day of fishing. I like to use a dry bag for the battery storage. The vinyl does not slip around in the hull and it will keep the battery dry. You also have no effort in creating a battery box out of Tupperware or some other container. To charge the battery, I have a 1.5 amp battery maintainer/charger. It automatically shuts off once the battery reaches a full charge. It's design is compact and I purchased it at AutoZone for $29.00. There are other alternatives to charging your battery, but this way if I forget to turn off the charger, I will not fry the battery.
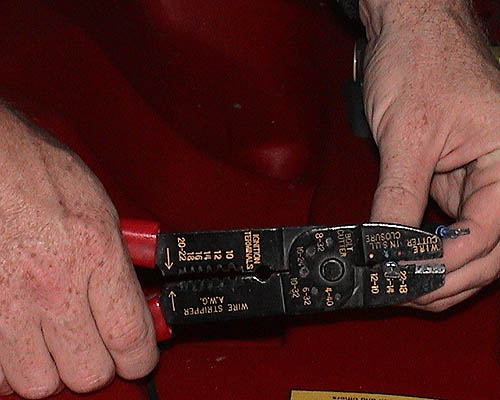
Next you will need to pick up some connectors at the auto parts store and crimp them on to the power cable. The power cable should be pre stripped. The color of the connectors correlate to the wire size. There are crimp color markings on the wire cutter, so use the blue section for blue connectors. I also had to crimp these connectors on my battery charger. Crimp each connector twice and tightly.
Once the connectors are firmly crimped on the wires, connect them to the battery making sure to put the red wire on the red terminal and the black wire on the black battery terminal. If you are paranoid, you can add an inline fuse on the red wire. To add the fuse, you will need to strip the cable to expose more of the red wire. If you keep the battery in a dry bag in your hull with the hatches closed, the fuse is more a comfort factor. I have been using my finders without the fuse for three seasons and have not had a problem, but if you are the type who likes to argue with customer service reps, you can lower your blood pressure by adding the fuse.
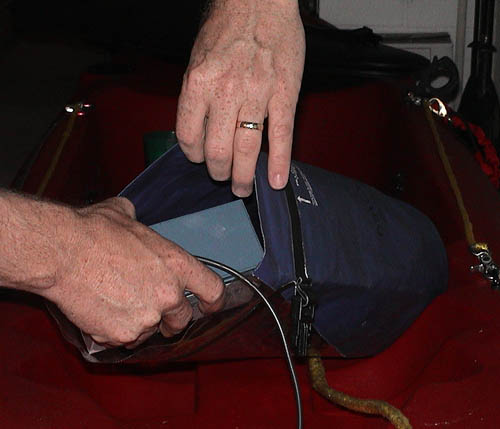
Put the battery in the dry bag. You can use a smaller dry bag, this just happens to be one of the dry bags I own and they are all this size.
Roll up the bag, just like you would if you had other items in the bag. The wire will roll up with the bag. Then clip the bag shut and place the bag in a spot in the hull that will not interfere with your other equipment.
What do you do with all the extra wire in your hull? I rolled up the transducer cable and zip tied it to the scupper hole and the power cord was short enough to just leave alone. |